


Key Takeaways
-
Density mapping matters. Graduated density at the hairline ensures a natural look and reduces extra chair time for plucking or thinning.
-
Standardize color references. Use physical hair samples or factory color rings instead of relying on photos alone.
-
Template and base fit are critical. Wrinkles, air bubbles, or mismatched frontal/temple contours usually come from warped or poorly marked templates.
When a Custom Hair System Doesn’t Match Expectations
Usually, a custom-made hair system should hit the mark—everything is specifically discussed, designed, measured, and manufactured for the one client alone. Anyone booking a fitting for a custom toupee or hair piece should walk in with expectations and walk out with a big smile on their face.
Happy clients, growing business—that’s the ideal picture.
But when a custom hair system misses the mark, things can get tricky. With higher prices and 8 or maybe 10 weeks of waiting, expectations build up. And when the result doesn’t turn out well, clients can feel frustrated or even disappointed. That translates into longer chair time and hours of careful, unpaid corrective work—plucking, thinning, recoloring, re-templating—none of that shows up on your invoice, but it eats directly into your margins.
In most cases, it’s not the overall quality that causes a custom system to fail; it’s the wrong specifications or misalignment between salon and manufacturer.
This article breaks down three common manufacturing details that can lead to a mismatch and explains how understanding them can save your salon time, reduce complaints, and keep your clients coming back.
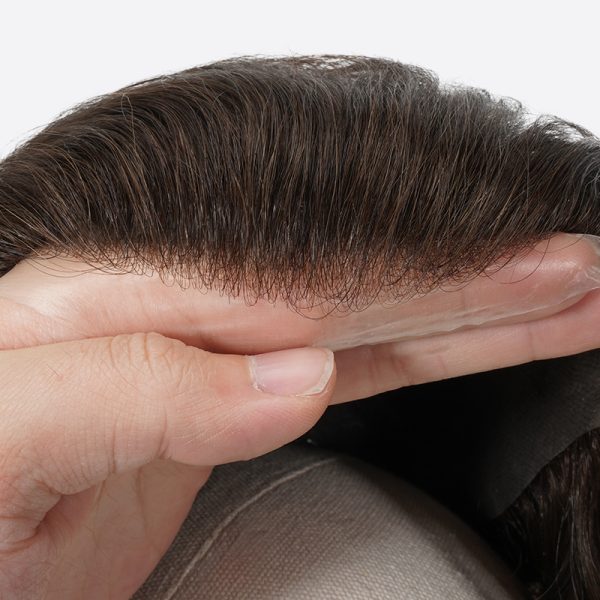
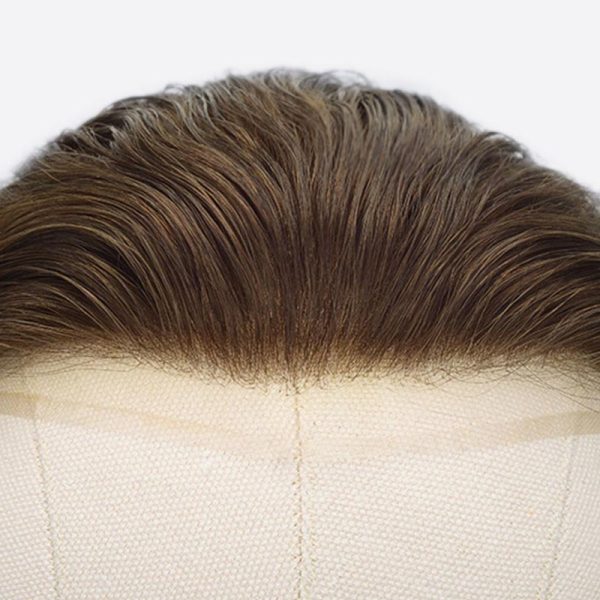
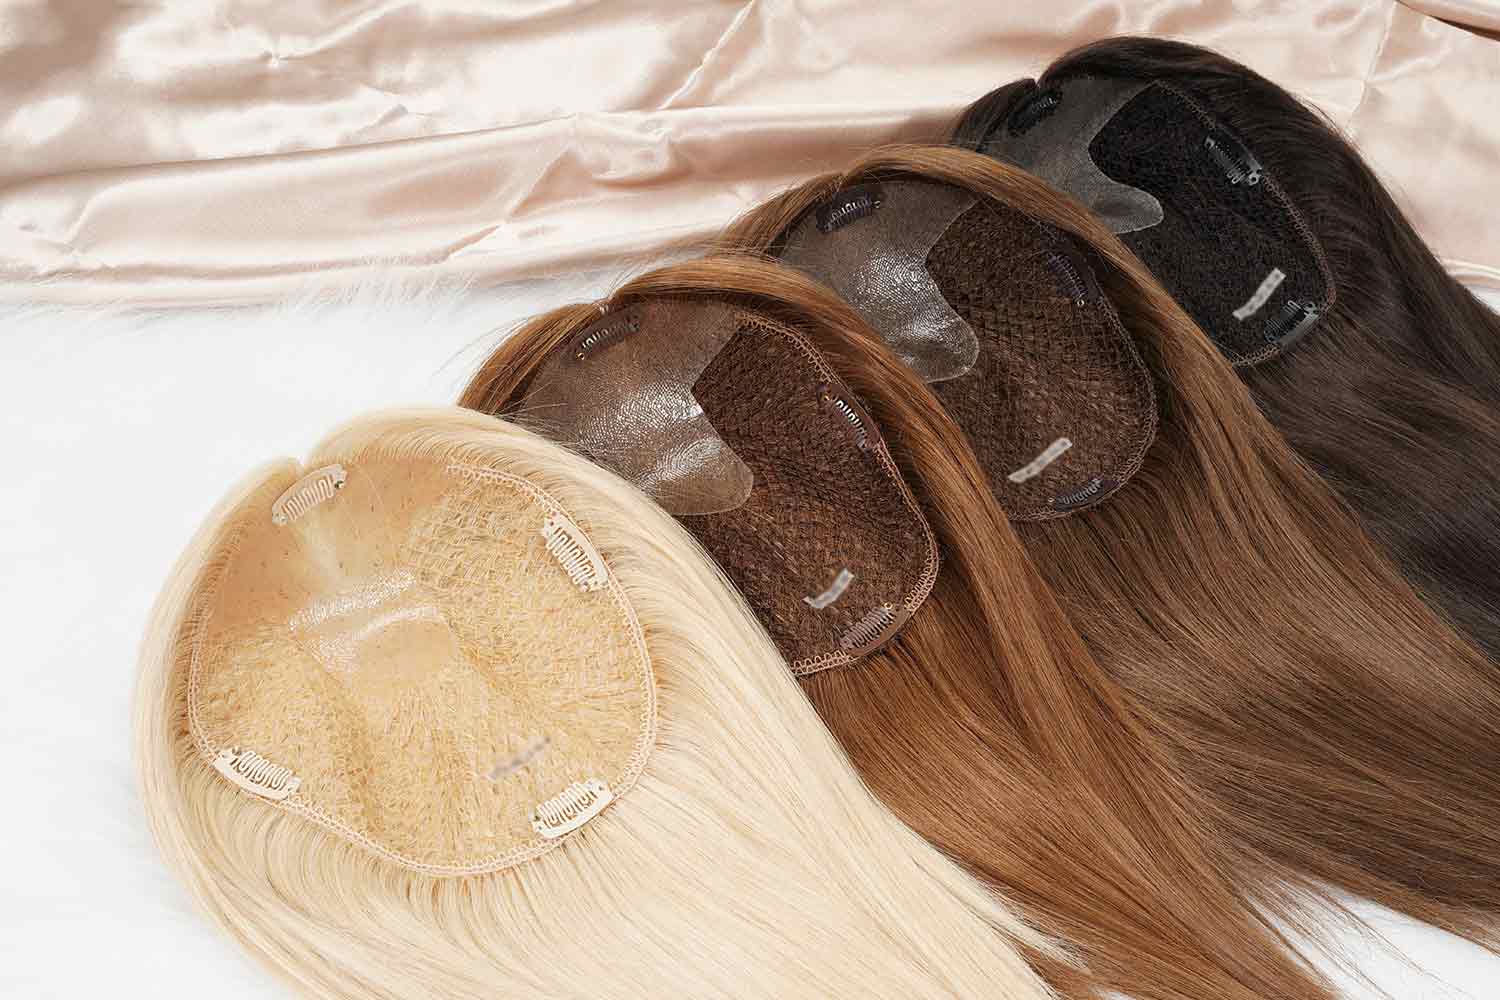
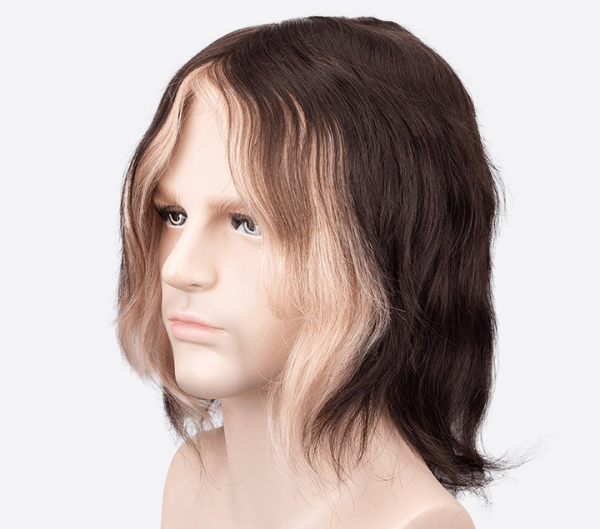
Custom Hair System Detail #1: Hair Density Mapping
The Problem
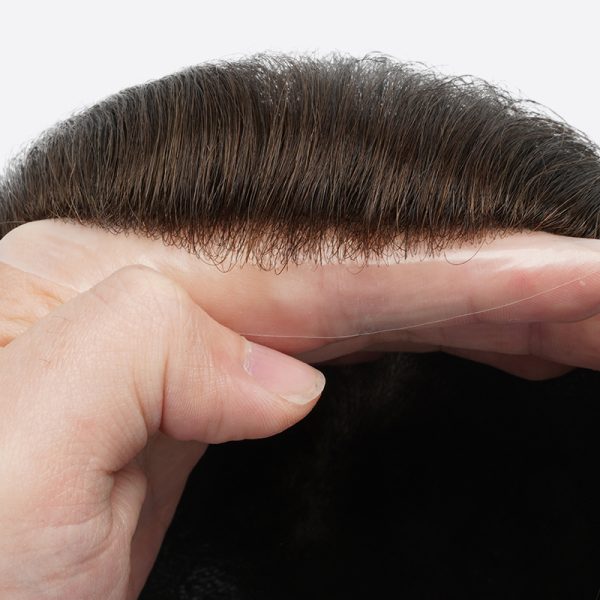
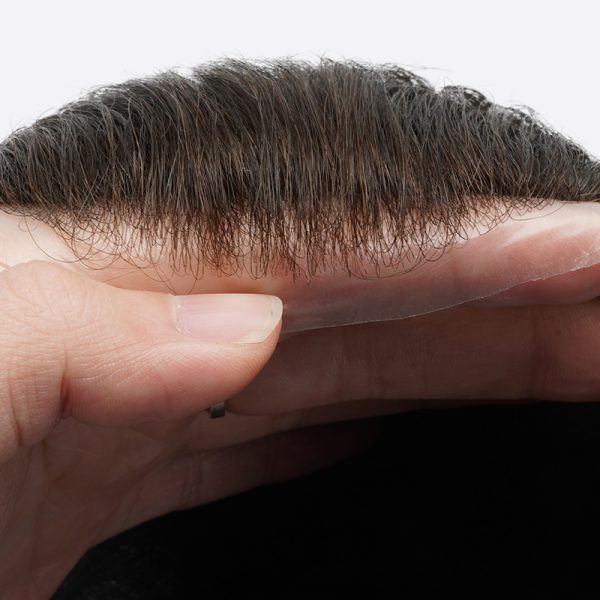
People who wear hair systems care a lot about the hairline, especially men. When a client asks for a high-density customized unit but doesn’t specify anything about the front hairline—you may want to watch out here—the hairline can end up looking a bit thick, like a wall of hair. If it looks less natural, you may need to spend extra chair time carefully plucking or thinning it to make it look just right.
The Fix
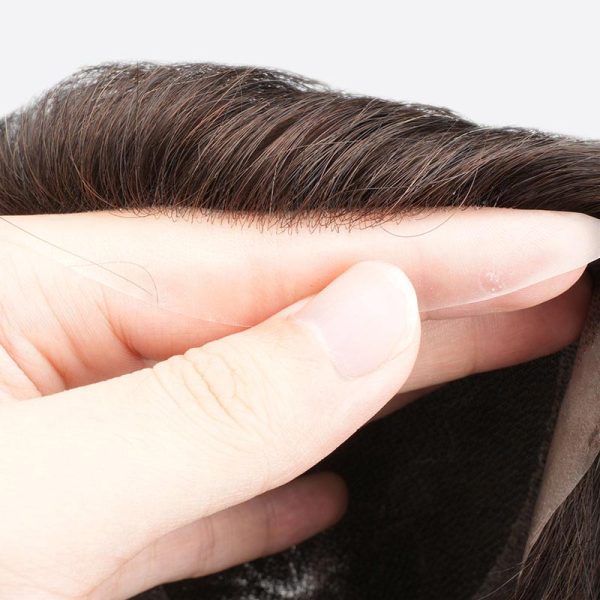
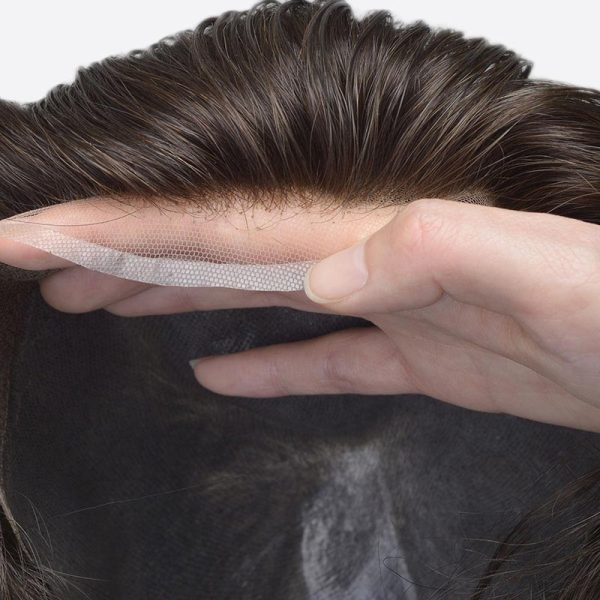
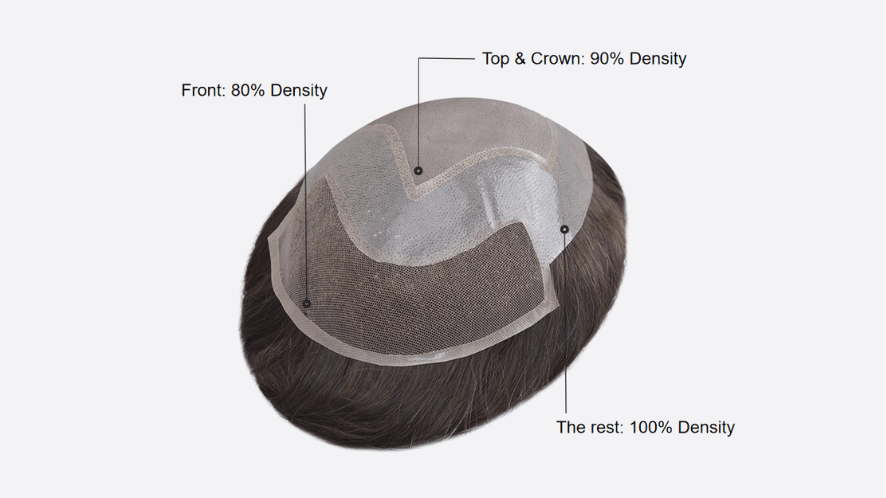
The solution is Graduated Density Mapping. From a manufacturing standpoint, the front hairline is usually designed slightly lighter than the rest of the unit to create a softer, more natural transition. In our factory, the first half inch along the hairline is intentionally kept at a slightly lower density.
That said, the difference at the hairline is often subtle. This is why it is important to discuss density zoning with your client before placing a custom order, especially when a higher overall density is requested. There’s no universal rule for hairline density. Age can be a helpful reference, but it is not the deciding factor. What matters more is how the density fits the person’s facial features, overall appearance, and personal preference.
For example, a man in his 40s may look natural with around 80%—90% density at the front hairline, gradually increasing toward the crown. More experienced hair system wearers may prefer different density levels across different zones based on what they are already used to.
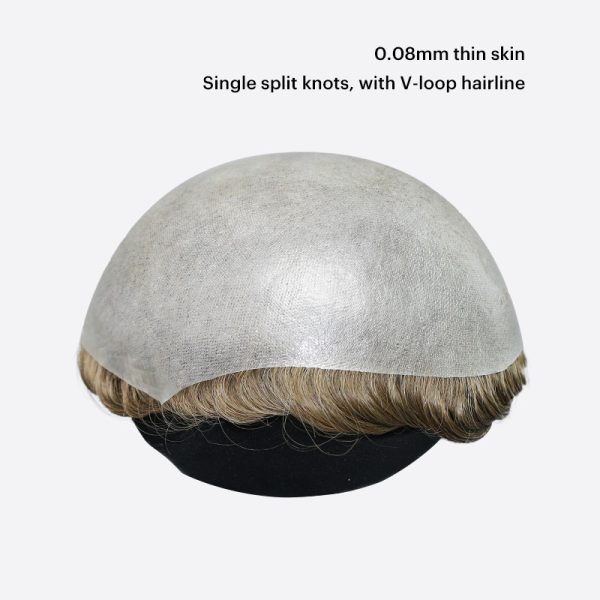
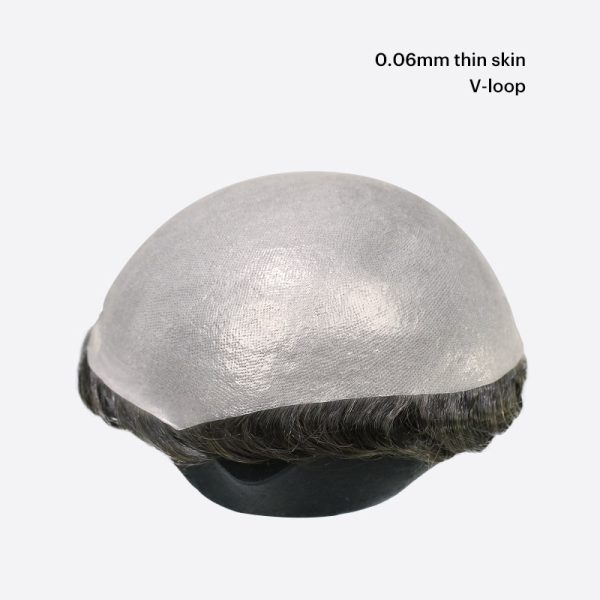
Quick Tip: The Most Natural-Looking Hairline Combinations
-
Skin base + V-loop ventilation (Injected ventilation can look even more realistic, but it tends to shed more easily—especially at the hairline, where shedding is already more common)
-
Lace base + single split knots + bleached knots at the hairline
Communication example: how to describe density for a custom toupee to your manufacturer
“I want the overall density to be 100%, the hairline density to be 85%, with a gradual increase toward the crown. The transition should look soft and natural, and my client plans to expose the hairline, so please avoid a thick or dense front edge.”
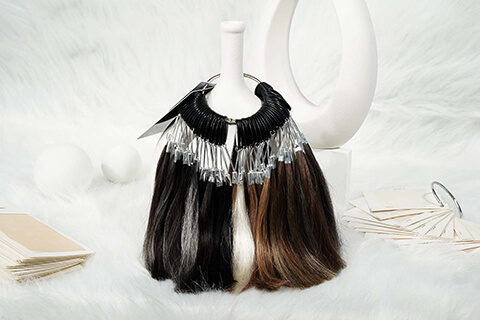
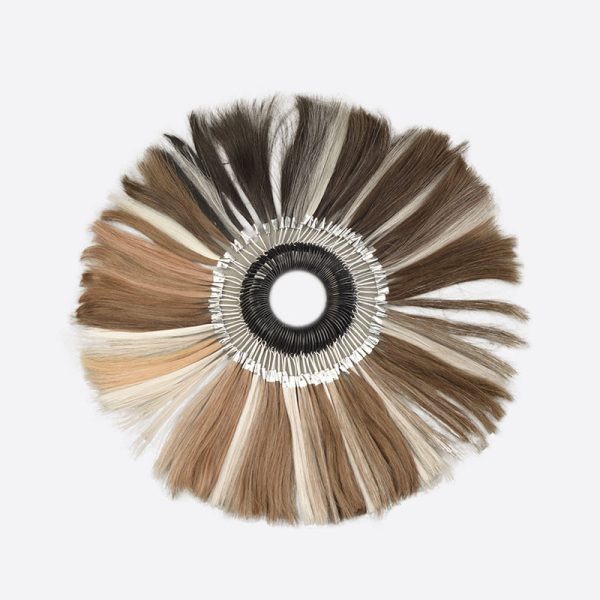
Custom Hair System Detail #2: Hair Color Match
The Problem
Color is another custom hair system specification that everyone pays close attention to. Same as hairline, it is immediately noticeable when things don’t go well. Even with a detailed custom order, sometimes the final hair system just doesn’t perfectly match the color the client expected. The problem is that the references don’t fully align.
-
One common scenario happens when a client requests a specific color code. But the thing is, even if two factories use the same color name or number, the final result may still vary slightly. Each manufacturer has its own color system, dye formula, and processing method, so the “#4” or “medium brown” your client required, is not always universal across suppliers.
-
Another frequent situation is color matching based on photos. Clients may send images of their natural hair and ask for a close match, but photos are inherently unreliable. Lighting conditions, camera settings, angles, and even hair styling can all distort how the color appears. What looks accurate on screen may not fully reflect the client’s real hair color, which makes visual judgment risky at the production stage.
In both cases, the issue comes from using different standards to define “the same color”. When expectations are built on non-standard references, the final result can technically follow the order and still feel mismatched to the client.
The Fix
The key is to reduce interpretation and work from physical, standardized references whenever possible.
-
Send a hair sample with the template. Most custom orders already involve mailing a head template. Whenever possible, include a small hair sample as well. This can be the client’s own hair or hair taken from an existing hair system of his. A physical sample gives technicians a far more reliable reference than photos, and to be honest, this approach puts no risk on your salon, because the hair sample comes directly from the client, and it’s then the factory’s job to reproduce the exact same color.
-
Choose colors from the factory’s color ring. This is the most stable approach. Select the color directly from the manufacturer’s official color ring. These colors are produced using fixed formulas and established processes, which means the final result is far more predictable.
-
Use your own color ring if needed. If you don’t have a hair sample or the manufacturer’s color ring, you can send the physical color ring your salon is currently using and clearly specify the shade your client wants. This gives technicians a clear, tangible reference and allows the factory to reproduce the color accurately.
Ordering Tools
Bono Hair Toupee Manufacturer Custom Men’s Color Ring


Communication example: the most reliable way to refer to a hair color for a custom toupee
“For this order, please refer to your Custom Men’s Color Ring (https://www.bonohair.com/bono-hair-toupee-manufacturer-custom-mens-color-ring/). The requested color is #1B.”
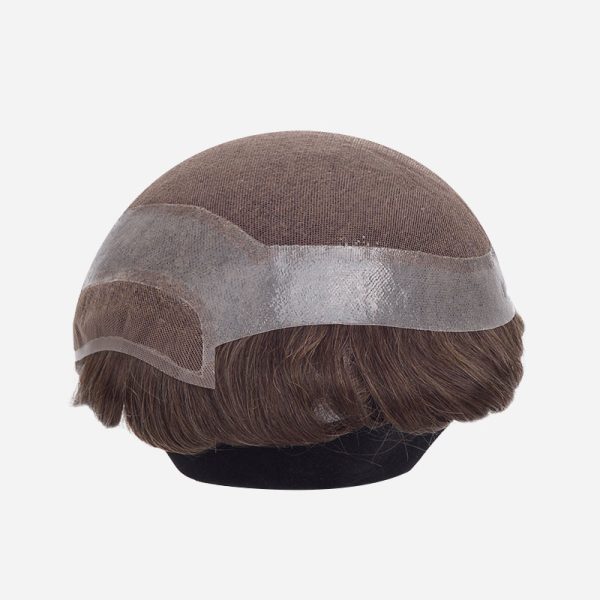
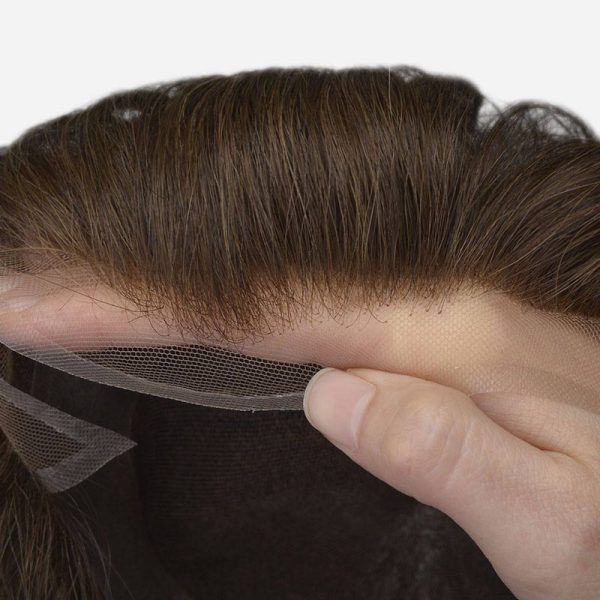
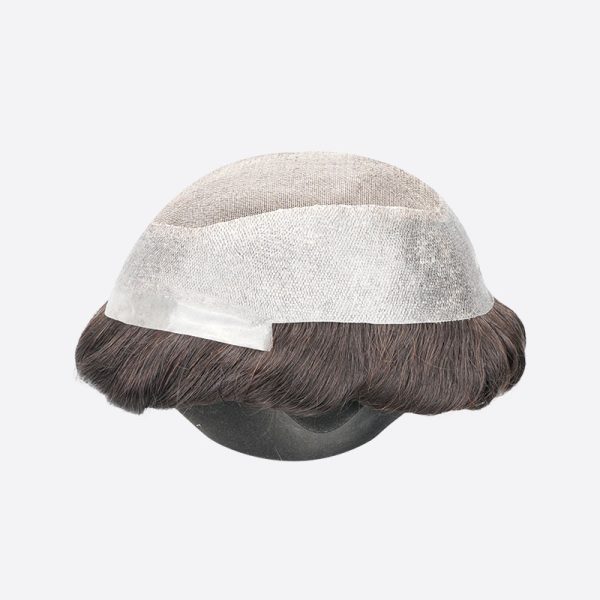
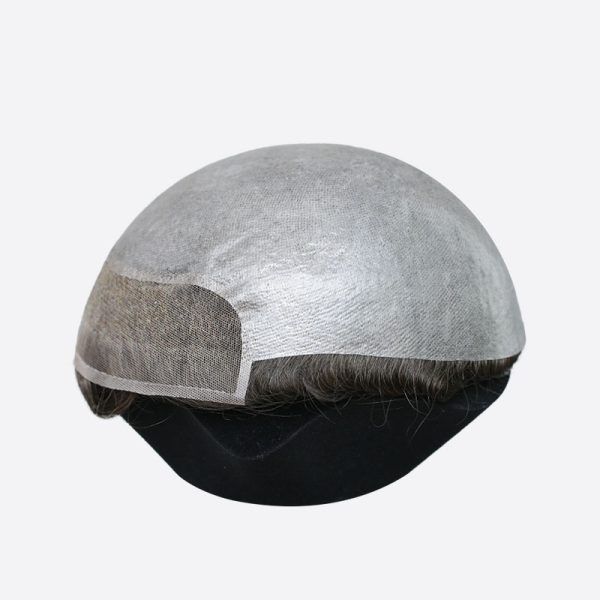
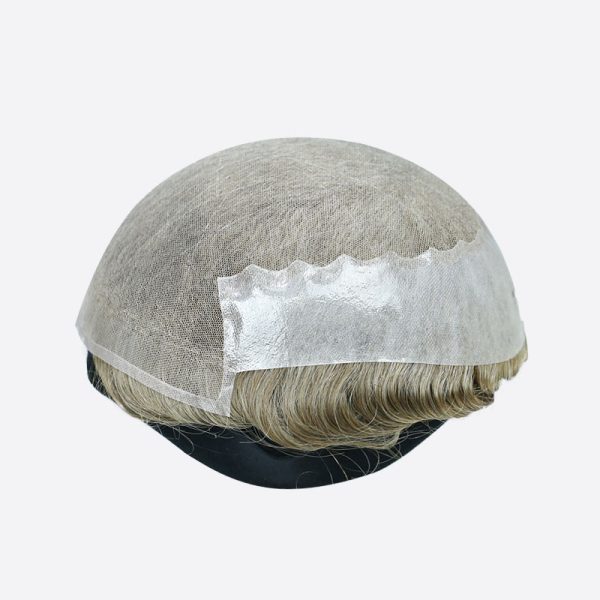
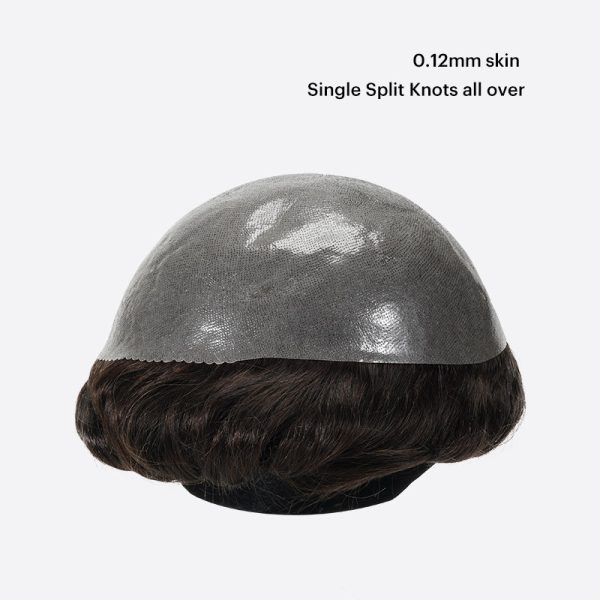
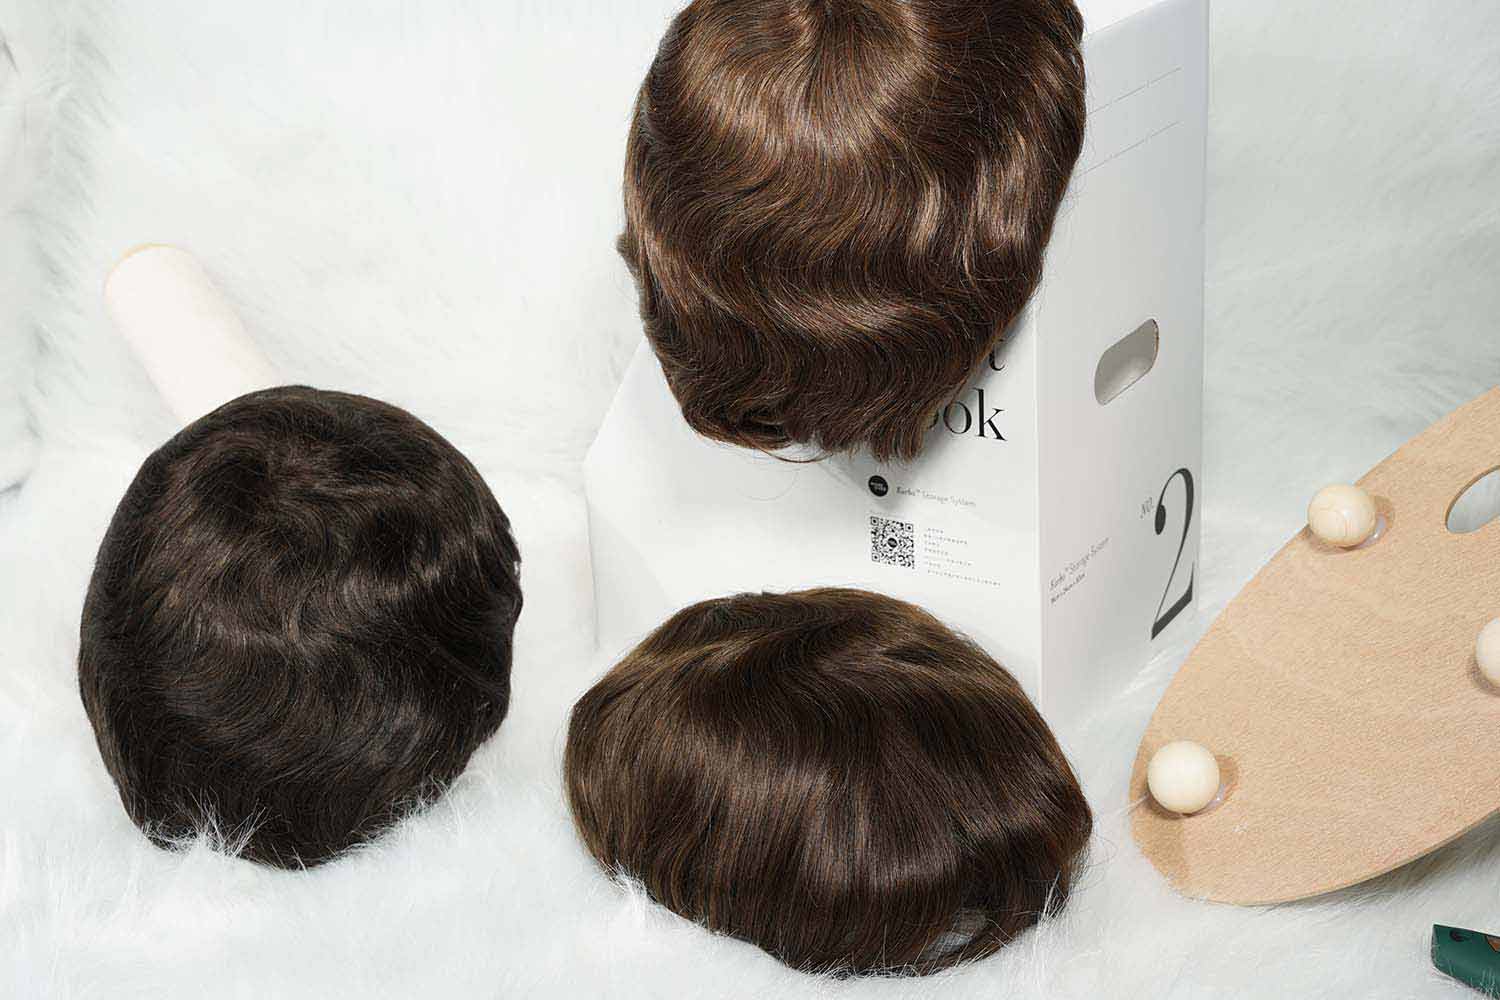
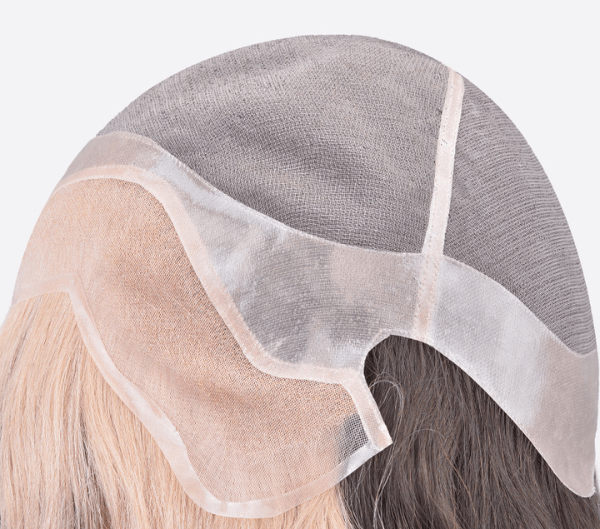
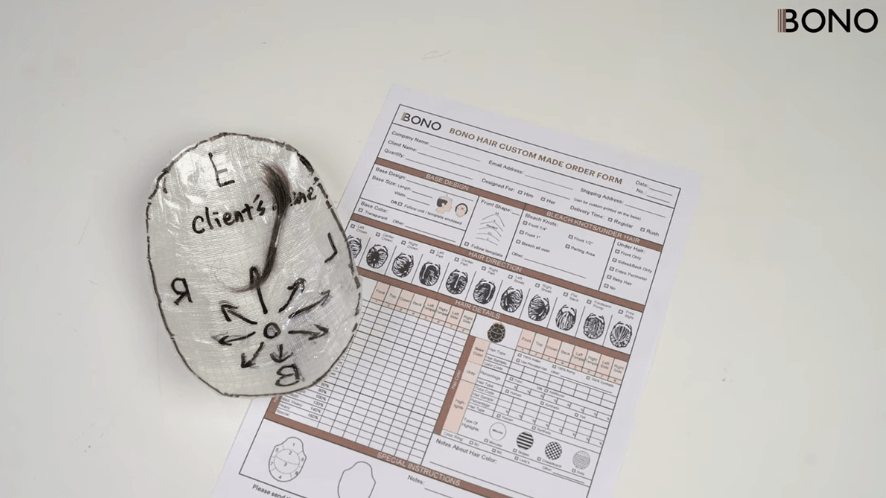
Custom Hair System Detail #3: Template Making & Base Fit
The Problem
This issue isn’t as obvious as density or color. You might not notice it the moment you unpack a custom hair system, but it’s one of the most common reasons for long chair time and re-fits. Clients may not see it immediately, but they will definitely feel it once the hairpiece is on.
The most frequent complaints include:
-
Wrinkles or air bubbles: appear when the template softens or deforms.
-
Temple recession mismatches: especially noticeable on M-shaped hairlines if the edges are drawn too round.
-
Frontal contour issues: variations in forehead shape can make the base sit unevenly, like a sheet that hasn’t been smoothed out.
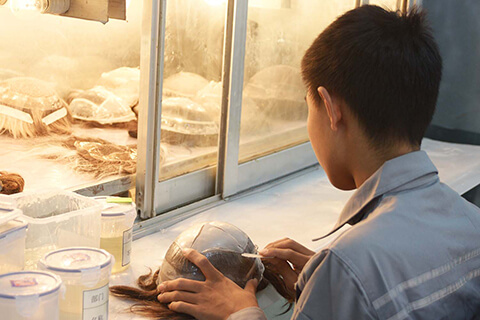
Often, the problem is not the measurements themselves, but how the template is made and marked. A template can warp if the protective film is not pulled tight or if too few layers of tape leave it too soft. By the time it reaches the factory, a deformed template produces a hairpiece that does not follow the natural curve of the client’s head. Incorrect temple lines or frontal contours usually lead to a poor fit and client discomfort.
The Fix
Pay close attention to the template when creating a custom hair system:
-
Pull the protective film tight and secure enough tape layers to keep the template firm.
-
Measure carefully and mark all boundaries clearly with a non-fading pen.
-
Check temple lines and frontal contours to ensure they reflect the client’s natural head shape before sending the template to the factory.
If you are new to this, our step-by-step video tutorial demonstrates the full process and highlights how to avoid wrinkles, air bubbles, and contour mismatches, helping you deliver a consistently perfect fit.
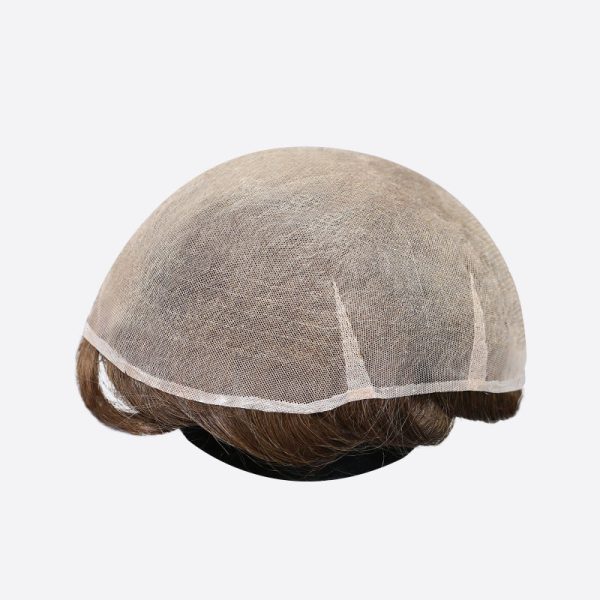
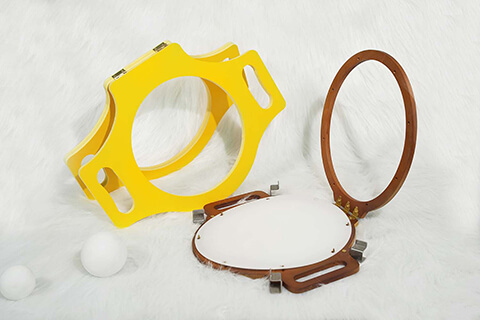
Template example
A Checklist: What to Confirm Before Placing a Custom Hair System Order
Most avoidable custom issues are locked in before production begins.
-
Template completeness and head shape markings
-
Front contour shape and forehead exposure
-
Density distribution across all areas, not just a single number (if needed)
-
Color references
-
Grey hair percentage and distribution
-
Base type and expected thickness
-
Ventilation technique
-
Parting, hair flow, and everyday styling
-
Wearing frequency and lifestyle considerations
-
Final written order form confirmation
Key Principle: If it’s not written down, it’s not part of the order.
Conclusion
Getting a custom hair system right comes down to the details—density, color, and template fit all matter. When these are done correctly, chair time is shorter, clients are happier, and everybody wins.
If you’re new to custom hair systems, now is a great time to explore. From January 26, 2026, we’re offering a free door-to-door template and sample pick-up service for customers who have not tried our custom hair systems yet.
To make sure you’re comfortable with every step, check out our Custom Process page—it walks through the full workflow and explains all the details you need to know to design custom hair systems for men and women. And if you want some ideas or inspiration, our Inspiration Gallery shows real examples of custom toupees and hairpieces we’ve created, highlighting unique base designs, color patterns, and density arrangements.
Partnering with Bono Hair means you’re not just placing an order—you’re working directly with the manufacturer and following a process that helps every custom hair system look natural, fit perfectly, and delight your clients.